How to Set Up Merkury Smart Wifi Camera
How to Set up Merkury Smart Wi-Fi Camera is a main focus when it comes to security and to the installation of a security camera. Merkury smart Wi-Fi camera is one of the best choices for keeping an eye on your house and business. The monitoring tools of the camera send high-quality HD pictures, of the place they are installed, online. You can check those pictures through the mobile application and stay updated about your house or workplace.
The camera’s motion detector checks on every movement in the workplace and updates you about it right away. Another exciting feature is its built-in microphone technology. Through the camera, you can also hear and even talk using the mobile application.
In addition to that, you can get the full high-quality HD voiced view of your property. Now, you have already bought the Merkury smart Wi-fi camera and are here to learn how to set it up on your property. To set up Merkury Smart Camera, this ultimate step-by-step guide will be helpful for you. Lets dive in.
What makes Merkury Smart Wi-Fi Camera the best pick?
The Merkury smart Wi-Fi camera is compatible with any up-to-date computer that can connect to the internet. You can check on your family through your Windows-driven PC regardless of time and distance. This makes your property and family 100% secure 24/7.
Moreover, the camera can be shared with your friends and family, if you cannot monitor it for any reason. Smart cloud storage, motion detection, and face recognition technologies also make it a perfect fit for people wondering about security.
Now, the problem is that you can’t access your camera through your laptop or desktop 24/7. Here, the question arises whether you can access your cameras without a laptop or not. The answer is “Why not!”. If you have a smartphone, either iPhone or Android you can access your cameras with one tap using a mobile application called Geeni.
The 8x zoom and 1080p HD quality enable you to give an exemplary check on your people and property. The camera also records all the moments for later use with 720p HD quality. The 0.2-second shutter speed can help you go through every moment quickly and precisely.
The most exciting feature of the Merkury smart wi-fi camera is that it has a set of walkie-talkies. This feature lets you speak through the camera with the people on your property regardless of distance and time.
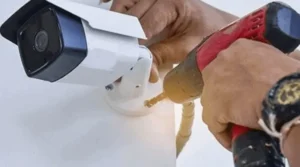
How to Set Up Merkury Smart Wi-fi Camera?
To install and set up Merkury Smart camera, you need to follow the following steps. Try not to skip any step to avoid frustration later. Before starting the actual process, you need to fulfill certain hardware and software requirements.
Gathering necessary tools and devices:
The following is the list of a few hardware and software tools that you may require in the installation process of Merkury Smart Wifi Camera.
Hardware requirements :
-
Mercury smart wi-fi camera:
The first thing you will need is the camera itself, which you want to set up.
-
Power adopter:
The second tool is an adapter for the power supply, you will find it with the camera package.
-
Power cable or USB cable:
Now, to connect the camera with the adapter you will need a USB cable, you will find it with the camera in the package.
-
Phone or Tablet:
To download the app and connect with the camera, you will need a smart device, either a mobile phone or a tablet.
-
Wi-fi Network:
Finally, the Wi-Fi network, as the camera solely functions upon the smooth and flawless Wi-Fi network. Make sure that the wi-fi is well-functioning, is smooth, and has good bandwidth.
Software Requirements:
-
Geeni Mobile Application:
To connect the camera to your smart device, you need to download the Geeni app from the App Store, App Store for iOS, and Google Play Store for Android users. After downloading, create an account if you are new to the app or sign in to your account if you have any. 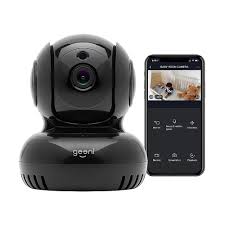
Optional requirements:
-
MicroSD Card:
There is an additional requirement for the people who want to record the camera’s footage, an SD card. You may check the user manual for the compatible size and storage of the card with your camera.
Merkury Smart Wi-Fi Camera Set Up:
After downloading the Geeni app, open the app. Tap on the ‘+’ icon on the top left corner of your app’s screen. Select ‘Add device’ and then “Wi-fi camera”. Follow onscreen instructions to proceed further. Add your wi-fi credentials; i.e. name and password. Finally, name your camera and you are done with the process. Before starting the actual process, consider the following things before you begin:
- The Internet is smooth and accessible.
- All the hardware and software tools are in hand.
- The spots are chosen for camera installation.
- Power outlets are near the desired camera spots.
- The user manual is in your hand.
- Now you are good to go.
Read the user Manual:
First, read the user manual included in the box of the Merkury smart Wi-Fi camera. This includes the feature list and the essential troubleshooting tips.
Download the Geeni App:
The next step is to download the Geeni App by searching ‘geeni app’ on Google Play or App Store depending upon your Phone.
Sign in or sign up:
If you are new to Geeni App, create an account or sign up for the app. If you are already registered on Geeni, just sign in to your existing account.
Turn on the camera:
- Connect the camera with your power adaptor through the USB cable, provided with the camera.
- Plug the power adaptor of the camera into the nearest power outlet.
- Check if the Blue LED light in the camera is blinking, if yes then move ahead.
Connect with the camera through the App:
- After starting the camera, Open the Geeni App from your mobile or tablet.
- Look for ‘+’ in the top right corner of the app.
- Tap on ‘Add Device’.
- Select “Wi-Fi Camera”.
- Follow all the instructions you find on the screen like:
- connect to wi-fi.
- Enter the device verification code, usually located on the package.
- Scan QR code etc.
Finish process :
- Finally, name your camera for easy identification, when the connection is established.
Supplementary settings :
You can now review the app customize the user experience and explore app features.
You can adjust night light, motion detector, face detection, audio detection, etcetera.
If you want to record the footage of the camera, insert a microSD card in your Mercury Smart wi-fi camera.
Troubleshooting and help:
- If you find any issues, check out Merkury’s official website.
- Check out the user manual for troubleshooting.
- You may also visit the help icon in the Merkury Geeni app.
FAQs:
- How do I connect my Merkury Smart Wi-fi Camera without a QR Code?
In your Geeni App, tap ‘+’ then ‘Add device’ and then ‘wi-fi camera’. You will see two options: “Scan QR code” and “Easy connect”, Select “Easy Connect”. Now find the reset button on the camera (a pinhole), use the reset pin to press and hold the button until you notice a beep sound or blue LED light. Connect to your wi-fi and you are done.
- What app do I download for my Merkury Smart Wi-fi Camera?
For your Merkury smart Wi-Fi camera, the app you should download is “Geeni”. You can search for “Geeni” on the Google Play Store (for Android) or App Store (for iOS).
- What should I do if the Merkury Smart Wi-Fi Camera doesn’t connect to the Wi-Fi network?
If your Merkury smart Wi-Fi camera doesn’t connect to the Wi-Fi network; check the power and Wi-Fi network. Try restarting the wi-fi and power supply. If the issue persists, reset and reconnect the camera. You should also check the mobile app permissions, update the app, or visit the help center if the issue persists.
- What devices are compatible with the Merkury Smart Wi-Fi Camera?
The compatible devices with Merkury smart Wi-fi cameras are Smartphones, tablets, and voice assistants like Amazon Alexa, and Google Assistant. However, the Microsoft Cortana is not yet used with Merkury devices. You may refer to the user manual for the compatible devices list as it varies for the specific models.
- Why is my Merkury Smart Wi-fi Camera not connecting?
This may happen because of various reasons. Check the power supply and Wi-Fi network. Ensure the bandwidth of your wi-fi is 2.5hz as the merkury smart Wi-Fi camera doesn’t support a 5hz connection. This may also happen because of invalid credentials for wi-fi or mobile app permissions. Double-check your connection methods.
The Verdict:
If you have bought a brand new Merkury smart wi-fi camera and don’t know how to install it, you are in the perfect spot. Merkury smart wi-fi cameras are the perfect fit for people who want to monitor their property and people remotely.
The article contains detailed information and a step-by-step guide to setting up Merkury Smart Camera. The article covers some basic troubleshooting tips and tricks, tools needed for the process, etcetera. Furthermore, you will also find some basic and frequently asked queries and a handful of interesting ideas for troubleshooting.
Hope you found the guide helpful, if you did, do share it with your friends struggling with the same issue. Tell us how you feel about the article in the comment section and refer to our blog for further queries.

Pingback: How to Change Wi-Fi on the Geeni App: - HowiPedia
Pingback: How to Install Merkury Doorbell Camera
Pingback: How to Use Merkury Camera Without Wi-Fi